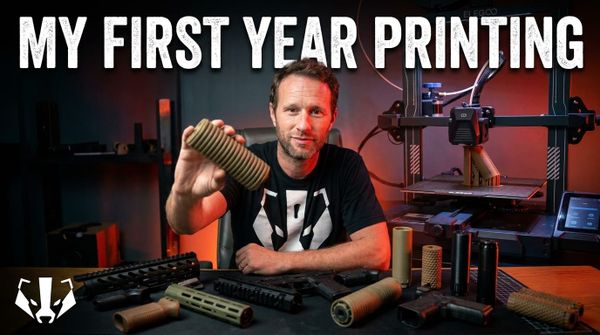
I Printed Airsoft Gear for a Year — Here's What I Learned

I Printed Airsoft Gear for a Year — Here’s What I Learned
A year ago, I published a video called “Things I 3D Printed in the First Two Weeks of Having a 3D Printer for Airsoft.” It became one of the most successful videos on the channel. I didn’t plan for that — I just pointed a camera at five or six rough prints and talked through what worked and what didn’t. A year later, the printer has barely stopped running, and the box of printed airsoft parts under my desk is overflowing.
This week’s video (watch it here) is a full-year retrospective: everything I’ve printed, what held up, what didn’t, and whether the whole experiment was worth it. This post covers the same ground in written form — for the search engines, for the people who’d rather read than watch, and for anyone on the fence about whether a 3D printer belongs in their airsoft workshop.
The printer I use (and what you actually need)
I print on a Bambu Lab H2D. It’s expensive — firmly on the high end of the consumer market. It’s enclosed, the heated bed gets hot enough for engineering-grade filaments, and it prints fast enough that I rarely wait more than a few hours for a finished part.
You do not need a Bambu Lab H2D to print airsoft gear.
A $200–300 printer running PLA Plus or PLA Pro will produce functional, field-ready parts. The difference is convenience, not capability. The H2D handles abrasive filaments like glass-fiber ABS without wearing down the nozzle, and the enclosure means I don’t have to think about ambient temperature. But a cheaper open-frame printer with a hardened nozzle upgrade will get you 90% of the way there for a third of the price. If you’re starting out, spend less on the printer and more on filament — you’ll go through more rolls than you expect.
What I’ve actually printed (and what survived)
The box under my desk has three categories: stuff I use every game day, stuff that worked but I replaced with a commercial part, and stuff that failed immediately.
The keepers:
- Suppressor housings with tracer unit threads. This is the category I’ve printed the most. A lightweight polymer tube with 14mm CCW threads on one end and an AceTech Brighter C tracer unit inside. The whole assembly weighs almost nothing, costs about $2 in filament, and if a BB cracks it, I print another one. I’ve done these in PLA Plus, glass-fiber ABS, and carbon-fiber ABS — all three hold up fine. The glass-fiber versions feel more solid, but I’ve never had a PLA Plus housing fail in a game.
- The MCQ Night’s Armament-style suppressor. This one takes a tracer unit internally and uses a threaded collar to lock the outer sleeve in place. The original design had a plastic coil spring that would pop loose under gas blowback recoil. The designer revised it with a proper threaded retention system after I sent feedback. That’s the thing about the 3D printing community — files get better over time because people actually use them and report back.
- Lancer mag covers for XM7 magazines. A simple cosmetic shell that slides over standard mags and makes them look like L7 Lancers. People have asked me to print these for them because there’s no aftermarket equivalent. When the commercial option doesn’t exist, the printer fills the gap.
- Camera mounts for Picatinny rails. A GoPro mount that clamps onto any side or top rail. Printed in PLA Plus with 100% infill. It’s survived a full season of CQB without cracking. Cost: maybe $0.80 in filament. The commercial equivalent runs $15–25.
The “worked but I moved on” pile:
- Foregrips. I printed a half-dozen different styles — angled, vertical, stubby. Some were uncomfortable. Some looked great but didn’t survive a hard knock. The vertical grip in glass-fiber ABS is still on one of my platforms. The angled one in PLA Plus cracked at the mounting point after two game days. Lesson: grips take impact. Use the strongest filament you can print, and orient the layer lines perpendicular to the force direction.
- The Zeus Rail from BTI (Blacktorch Industries). A replacement handguard for the Sega 12 SBS. The print itself was functional, but the surface finish wasn’t where I wanted it. I could have sanded and sprayed it, but I ended up going a different direction with that build. The file is good — my execution was rushed.
The failures:
- Anything printed in standard PLA (not Plus, not Pro). Standard PLA warps in a hot car, cracks on impact, and softens in direct sunlight. Don’t use it for field gear. Keep it for prototyping and test fits.
- Parts with thin walls oriented parallel to the layer lines. A suppressor end cap I printed with 2mm walls split clean along a layer line the first time it took a BB. Reprint with 4mm walls and 100% infill, and it’s been fine ever since.
Filament: the part nobody explains up front
The filament you choose matters more than the printer you buy. Here’s what I’ve settled on after a year of trial and error:
| Filament | Cost per kg | Best for | Notes |
|---|---|---|---|
| PLA Plus / PLA Pro (eSun, Polymaker) | ~$19–22 | General-purpose field parts, grips, mounts | Good impact resistance, easy to print, won’t warp in moderate heat. This is your default. |
| Glass-fiber ABS | ~$30–35 | High-wear parts, suppressor housings, anything that takes repeated impact | Requires an enclosure and higher bed temps. Stiffer and more heat-resistant than PLA Plus. |
| Carbon-fiber ABS | ~$35–40 | Show pieces, parts you want to look factory | Expensive and abrasive on nozzles. The finish is excellent. Overkill for most airsoft applications. |
| Standard PLA | ~$15 | Prototypes, test fits, display pieces | Do not field this. It will warp, crack, or melt. |
A $20 roll of PLA Plus will print 20–30 suppressor housings. That’s under a dollar per part. Even the expensive filaments work out to $1–2 per part for most airsoft accessories. The economics are absurd compared to commercial alternatives — a single commercial tracer-ready suppressor runs $40–80.
The workflow that actually works
After a year, my process has settled into a rhythm:
- Find the file. Printables, Thingiverse, Cults3D, and direct from designers’ Patreons. Search “[airsoft platform] + [part type] + STL.” If it doesn’t exist, that’s a signal — either nobody needs it, or you just found a gap.
- Test print at low infill. 15–20% infill, standard PLA if I have it loaded. This takes 30–60 minutes and tells me whether the dimensions are right and whether I actually like the part.
- Production print at 100% infill in PLA Plus or GF-ABS. This takes 2–4 hours depending on size. I orient the part so layer lines run perpendicular to expected impact direction.
- Post-processing. For functional parts, usually nothing — maybe a quick sand on contact surfaces. For cosmetic parts, wet sanding from 400 to 1000 grit, then a matte clear coat. Heat-set threaded inserts (the brass kind you press in with a soldering iron) for anything that takes a screw repeatedly.
Is it worth it?
The printer paid for itself in about four months — not in literal dollars saved, but in parts I would have bought otherwise. A single commercial suppressor, a couple of optic mounts, and a handful of foregrips would have exceeded the cost of the printer and a year’s worth of filament.
But the real value isn’t financial. It’s that I stopped waiting for manufacturers to make the part I wanted. If I need a specific mount for a specific optic on a specific rail, I can have it tomorrow. If a part breaks on Saturday, I can print a replacement for Sunday. If a member asks for something that doesn’t exist commercially, I can make it.
The printer is the most versatile piece of equipment in my workshop. If you play airsoft regularly and you have desk space for a printer, this is the single best non-airsoft purchase you can make for the hobby.
Watch the full video: I Printed Airsoft Gear for a Year — Here’s What I Made
Sources: transcript from processing/airsoft_items_i_have_printed_in_my_first_12_months/transcript/transcript.txt, video metadata from youtube_meta.json, gear references from brain/09-gear/EMG.md and brain/09-gear/Phantom_Gear.md.