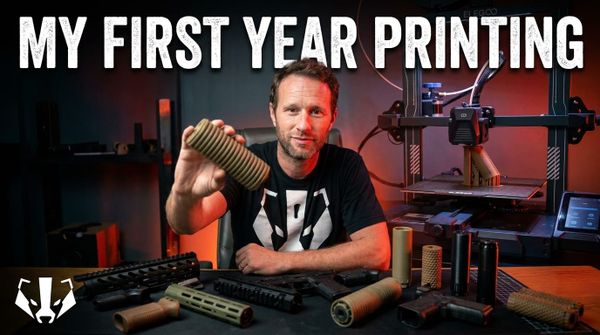
What I Learned 3D Printing Airsoft Gear for a Year
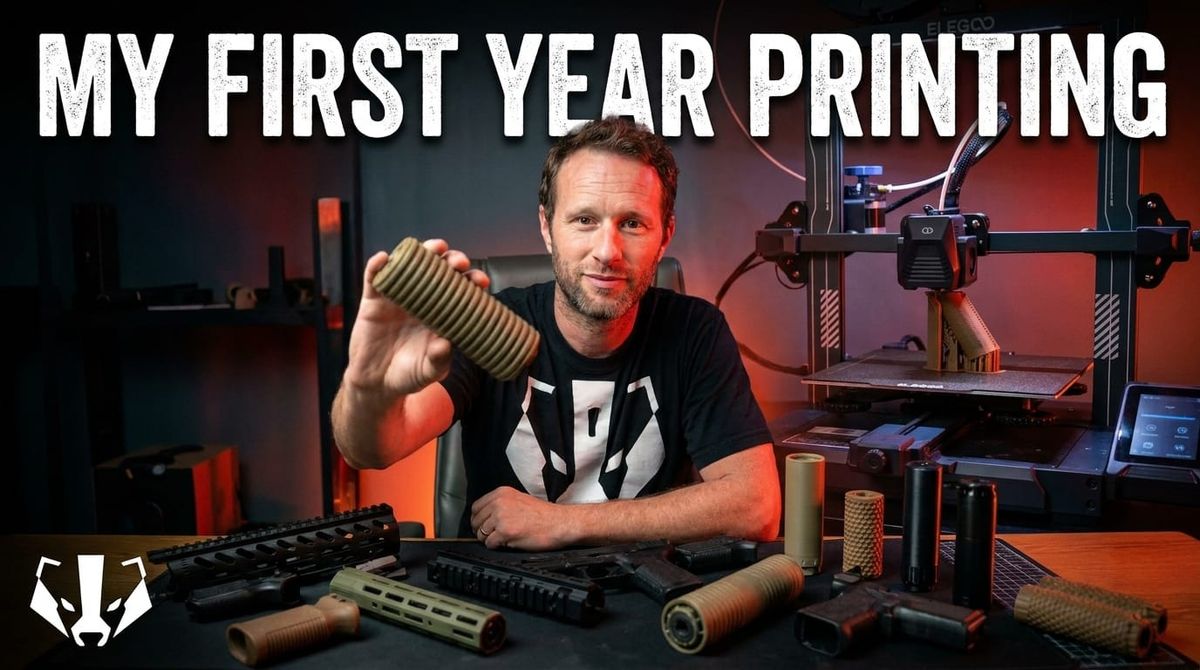
What I Learned 3D Printing Airsoft Gear for a Year
About a year ago, I bought a 3D printer specifically for airsoft. I had seen the files floating around online—rails, grips, suppressors—and I wanted to see if the hype was real. After twelve months of printing, testing, breaking, and reprinting, I have a box of parts that work, a box of parts that don’t, and enough experience to tell you what’s actually worth your time.
This isn’t a buyer’s guide for printers. This is a field report from someone who has actually printed gear, run it at games, and learned which filaments survive a summer in a hot car and which ones warp into modern art.
The Setup That Actually Works
If you’re starting from zero, the filament choice matters more than the printer brand. I run three materials regularly:
PLA+ (Esun PLA Pro or Polymaker PLA Pro): About $19-20 per kilogram. This is your workhorse. It prints fast, doesn’t require an enclosed printer, and holds up fine for range toys and indoor gear. I use it for test prints and anything that won’t take impact or sit in direct heat.
Glass Fiber ABS: Around $30-35 per kilogram. This requires an enclosed printer that can hold temperature—heated bed, hot chamber. The finish is noticeably better, and the parts are far more durable. I print pistol grips and rail mounts in this.
Carbon Fiber ABS: Similar price point to glass fiber. Rigid, lightweight, and looks professional. I use this for anything that needs to look like a finished product, not a prototype.
Normal PLA is not worth your time. It warps in heat, cracks under impact, and you’ll end up reprinting everything within a month. Spend the extra few dollars on PLA+ minimum.
The Prints That Earned Their Keep
After a year, these are the designs that stayed in my rotation:
Zeus Rail (Blacktorch Industries) for the Sega 12 SBS. The factory rail on that platform is an eyesore. This replacement drops on clean, gives you proper mounting options, and costs pennies in filament versus the one aftermarket aluminum option that costs triple and weighs more.
MCQ Night’s Armament Suppressor. This is a two-part print—body and end cap—with threads for 14mm counterclockwise. The designer updated it based on feedback I sent: the original had a plastic coil that would pop loose under gas blowback recoil. The threaded version locks tight and runs clean. I printed one in tan, one in black, and I run them on different setups.
Lancer Mag Covers for the XM7. These snap over your magazines and give you the L7 Lancer look without hunting for discontinued parts. I’ve had members message me asking for prints because they can’t find these anywhere else.
Camera Mounts. Simple Picatinny-mounted GoPro brackets. I run one on my helmet rail and one on my platform. Printed in PLA+ because they’re not taking impact—just holding angle.
The Hybrid Approach
The best print I run isn’t pure 3D printed. It’s a Socom-style suppressor body printed in lightweight polymer, wrapped with a real Manta cover. The cover costs $80 for a full-length real steel version, but you can run a shorter cut on a printed core. The result is lighter than all-metal, quieter than bare polymer, and costs a fraction of a full aftermarket suppressor.
This is where 3D printing shines—not replacing every part, but filling gaps where the market doesn’t serve airsoft specifically. The printed core takes the threads. The real cover takes the abuse. Together they work better than either alone.
What I Stopped Printing
Not everything worked. I printed a vertical foregrip that looked great but felt terrible in hand—the angle was wrong, the texture was wrong, and I dropped it back in the parts bin after one game. I printed rails that fit loose and needed shimming. I printed suppressor bodies that cracked when dropped on concrete.
The lesson: start with a test print at low infill. Check fit, check function, check feel. Once you know the design works, print it again at 100% infill with quality filament. The time you save not reprinting failed parts pays for the filament cost.
The Real Cost
A kilogram of PLA+ runs about $20 and prints roughly 20-30 pistol grips or 10-15 suppressor bodies. Glass fiber ABS at $35 per kilogram is nearly double, but the parts last. If you’re printing gear you actually run, the upgrade pays for itself on the second broken PLA part you don’t have to replace.
Printer time is the hidden cost. A 100% infill suppressor body takes hours. Queue management matters. I run test prints overnight, review in the morning, and queue the final prints for days when I’m not waiting on the part.
Should You Buy a Printer?
If you have the space and you can afford the entry cost, yes. Not because you’ll print everything—you won’t. Because you’ll print the things that don’t exist, or that exist but cost too much, or that you want to customize. The Zeus rail for the Sega 12 SBS doesn’t have a mass-market manufacturer. The Lancer mag covers are discontinued. The specific foregrip angle you want isn’t in any catalog.
3D printing for airsoft isn’t about replacing the industry. It’s about filling the gaps the industry leaves open. After a year, I have fewer gaps in my kit and a better understanding of what I actually need versus what just looks good in a product photo.
Start with PLA+. Move to glass fiber when you’re printing parts that take stress. Test everything before you commit to a full print. And keep a box for the failures—you’ll learn more from what breaks than from what works the first time.
Source: I Printed Airsoft Gear for a Year — Here’s What I Made (6mm Badger, 2026-05-31)
Filament brands mentioned: Esun PLA Pro, Polymaker PLA Pro. File sources: Blacktorch Industries, Bastard Labs, MCQ Night’s Armament designs.